My Self Manicure Experience
Posted: August 19, 2010 | Author: missavogue | Filed under: Art, Beauty, Fashion, Relaxation, Thought | Tags: august, back to school, brush, burberry, check, checkered, child, children, chocolate, cookie, cozy, cuticle, design, email, equinox, exfoliating scrub, fall, glitter, gold metallic, halloween, hot chocolate, kid, leaf, leaves, manicure, nail, nail polish, pattern, perfectionist, pretty, remover, sally's beauty supply, sand & surf, school, scrangie, september, shimmer, spiced pumpkin, spilled paint, stripe rite, topcoat, twitter, walgreens, wet n wild, winter, yankee candle | Leave a commentSource
It’s Fall. Even though it’s 100 degrees outside, its August, so it’s Fall. Why do I consider it Fall in August and not September 22nd like the Equinox tells me? Well, because August is Back to School time. When I was a kid, if it was Back to School, Summer was OVER. No more bright Summery colors. The stores start to sell Halloween colors, so everything is black and orange. Those are not Summer colors. There is no black in Summer colors. Fall colors are starting and I’m ready!
I’ve redone my apartment. I took all the bright neon greens and yellows out of view. I changed the candle that adds the fragrance to my apartment from Sand & Surf to Spiced Pumpkin. I turned my pillows around so they’re not all patterned and cheery. Now, they’re all solid and cozy and just make me want to relax and sit in front of the fire with some hot chocolate. My mind is getting ready for Winter.
Source
After giving my house a makeover, I decided it was my turn. I went to Sally’s and got the Stripe Rite Paint in Gold Metallic. I really wanted to do my nails because I have been biting them a lot lately and I always leave them alone when they look good. I decided to give myself a manicure.
I needed a fresh pallet, so I knew I needed to start from the beginning. I used to SWEAR by Scrangie‘s self manicure tutorial (who is the *Goddess* of nails by the way), so I decided to search through her posts to see if I could find it. I don’t know why it’s not in my bookmarks. It really should be.
When I couldn’t remember what year she wrote it, I got on Twitter. I knew she was on there, so I just decided to ask her. If she answers, awesome. If not, I’ll find it sometime. Well, she DID answer super quickly. She told me that she would e-mail me and let me know what to do. Oh my goodness – she’s AWESOME!
Of course, because I’m super impatient, I didn’t wait for the e-mail to start the manicure. I did what I remembered doing in the past and it worked out okay for me. I used a color that had been sitting in the pocket of my purse untouched for months and layered the gold shimmer on top of it in a checkered pattern.
Yes ... it's all smudgy. I know.
The problem? I didn’t like the design. I hated that it looked like a kid did it. It just wasn’t professional or fashionable at all. It just looked terrible. So, I decided to change it. I really do NOT recommend changing your nail polish if it’s a mess unless you REALLY plan on spending a long time on it. Especially if it’s in the crevices of your nails. It really takes a lot of work to get the color out.
By the time I finished removing everything I had just done, I got the email. (Yay!) I had learned a few things with the first coat, so I was ready to incorporate the tips she gave me with my own.
First I did the basic manicure (The boring part) – Remover, cuticle remover, cuticle pusher, exfoliating scrub, cuticle nippers, light buff, remover again. Then it was time for me to be artistic. I started on the thumb of my left hand. There are a few reasons I did this.
- I wanted to practice on one finger to see how my design would turn out.
- I wanted to start with my good hand, but I didn’t want to mess up the polish on my bad hand. This way, while I’m doing my bad hand, my thumb will be on top of the brush and I don’t have to worry about it hitting my other nails. (Does that even make sense?)
- I had something pretty to look at while I painted the rest of my nails.
So, to put the polish on, first you need a base coat. When this coat dries, it’s pretty thin. It almost looks like you have nothing on. This is the equivalent of putting cooking spray on a cookie sheet before you bake a batch of cookies. If you leave that step out, when you go to take the polish off, it will stick to your nail like cookies to a sheet.
After that dries, it’s time for the polish. You need a pretty large bead of the polish on the brush. Don’t scrape off too much on the bottle. That could lead to streaking and lines in the polish. Place the bead pretty close to where you want it to stop, but not all the way. From that spot, push the brush to the end of where you want the polish to end. Don’t push all the way to your cuticle. That will cause the polish to get too deep in the cracks and you’ll never get it out of your cuticles. Try to spread that bead around your whole nail, but don’t let the brush get too dry. If you need more, dip again.
From this step on, On the hand I always mess up on, I did one nail at a time. This is mainly because I wanted to really get it perfect. If you don’t have time to do this (or if you’re not a super perfectionist like me), you can do them all before moving on to the next step.
Source
(Nope it's not mine. But it goes with the title :))
Next, I just did another coat. The polish I used was pretty transparent. It was a Wet ‘n Wild Polish I got from Walgreens, so it wasn’t super high quality.
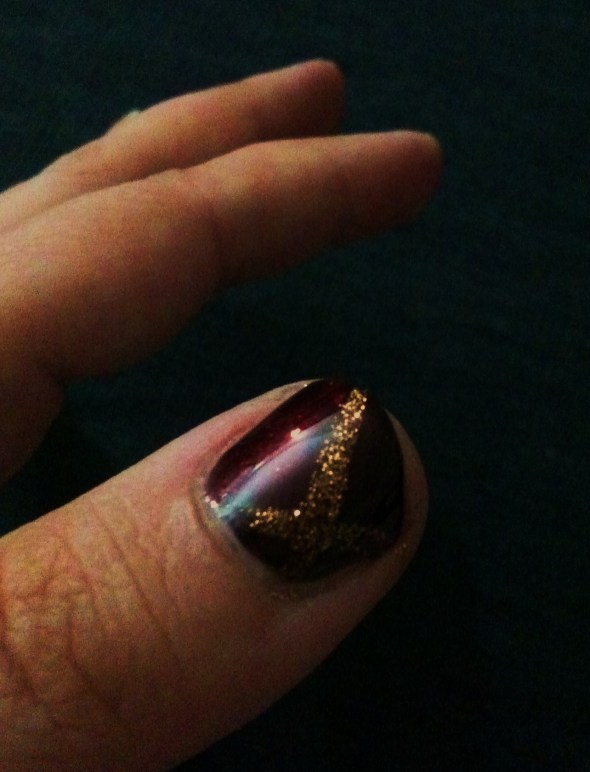
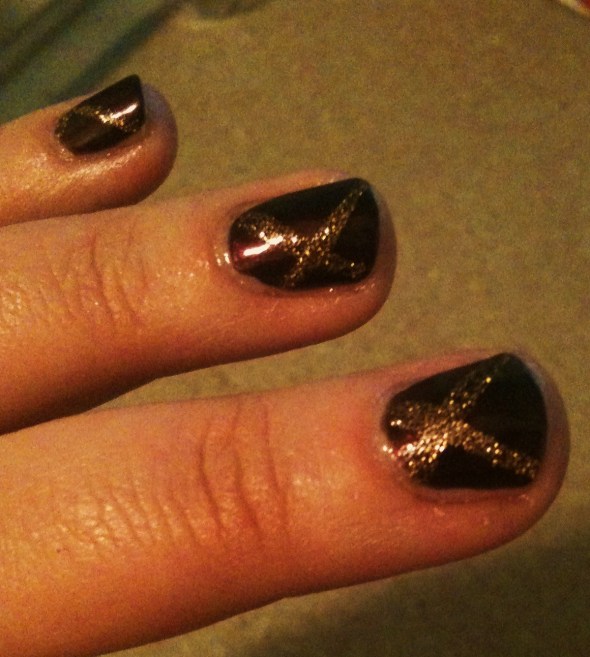
After that coat dried, I took my glitter brush and just painted a couple stripes on each nail. This time, I only did 2 stripes in a large check pattern. It kind of reminded me of the Burberry colors and a little of the pattern. It looks a lot more professional and classic like that.
After that, I applied a topcoat which kind of seals the colors together and makes the nail look smooth and shiny. It also helps with any chipping problems you may have. After the topcoat dries, you can put on some kind of cuticle oil. Solar oil is my favorite – and it smells FANTASTIC. Just put it on your cuticles. You can rub it in if you’d like, but you don’t have to. Put lotion on top and your nails will look super pretty.
Do you have any other nail tips to share? I’d love to hear them!


